The US '83 Festival - 30 Years Ago?
I don't like to take strolls down Memory Lane very often, but it just hit me during this Memorial Day Weekend that it's been 30 years since the footnote in music history known as the "US '83" Festival. Longtime readers of barflies.net might remember that I wrote something about it 10 years ago but, as time goes on, I must continue to revise history. As the saying goes - the older I get, the better I used to be.
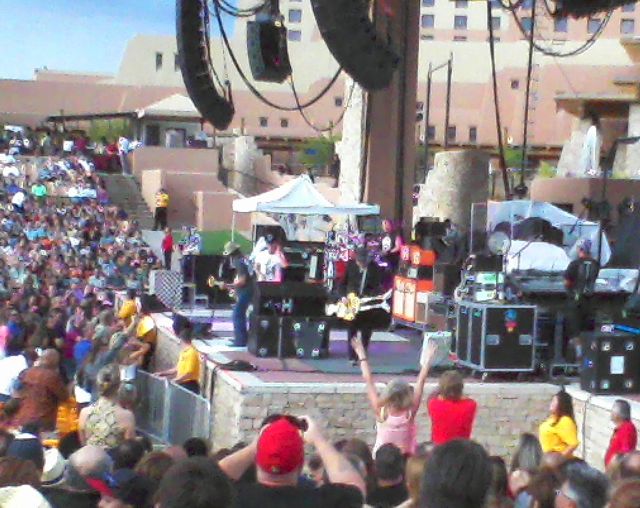
Here's the story: In 1983, I worked as one of those "hey peanuts!" vendors at Anaheim Stadium - home of the California Angels (note the deliberate use of obsolete names). Along with a few other "hawkers", I signed on to work as a roving soft drink vendor for the US '83 multi-day music festival in the hills above San Bernardino, CA. We were promised a commission-based pay along with meals and free campsites. The meals turned out to be leftover hotdogs and the "campground with a stream" turned out to be a dusty gravel parking lot with an open sewer, but we really didn't mind. The selling point for most of us was the music. The Clash were headlining Day One. I was more interested in seeing one of my favorite bands -- getting paid for it was just gravy. I wasn't about to buy a ticket for this circus and have to sit through eight or nine opening bands, so I was in. How much were tickets anyway? Twenty bucks a day? Outrageous!
My plan was a simple one: I would work during the bands I wasn't interested in and take breaks when there was a band I wanted to see. My vendor pass gave me access to everywhere but backstage, so I had some good vantage points.
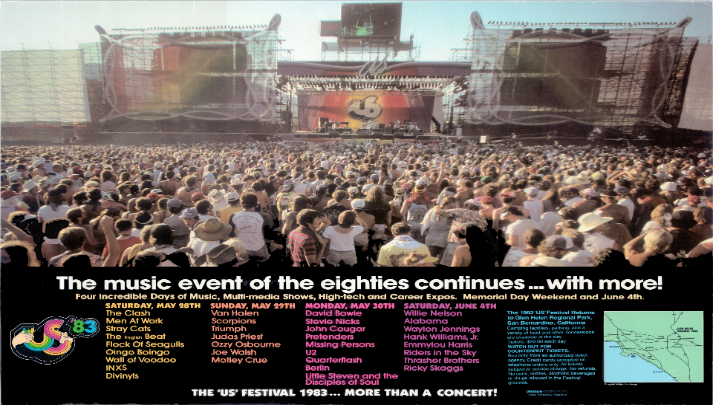
I did buy a program (for $4.00), which I still have. Without it, I surely would have forgotten at least half the bands that played. Here, according to my official vintage souvenir concert program, is the complete line-up with my recollections:
DAY 1 - MAY 28TH - NEW WAVE DAY
Divinyls - I remember nothing about them.
INXS - I remember very little about them. They got big later.
Wall of Voodoo - I had seen them in an empty club a couple of years previous and they didn't really translate to the big stage. I don't remember if they did their "barbecued iguana" song. They probably did.
Oingo Boingo - I don't know where I was when they played. They must have played because it's printed here in the program.
The English Beat - I'm trying to find a smooth way to work "Save It For Later" into this. No luck.
Flock of Seagulls - A punch line even then. I ran. I ran so far away.
Stray Cats - They were great and really cleared the seagull poop out of my ears. They may have been marketed as a retro novelty act, but they could really play.
Men At Work - There really once was a number one hit single with the word "chunder" in it. Call me old-fashioned, but I like that.
The Clash - I had seen them several times before and this show turned out to be their last hurrah. They were about to break up and I may have sensed it, but even at their worst I thought they were great.
Yeah, I know they tried to come back with a new line-up but that's best forgotten.
DAY 2 - SUNDAY, MAY 29TH - HEAVY METAL DAY
Here's where I tell you what a big wimp I was. Here's my excuse - no sleep, bad food, and maybe a little bit of a hangover. The morning was hot and dusty. It was already 100 degrees at noon when Quiet Riot started to play. Quiet Riot sucked. They sucked, sucked, sucked. People were crawling over fences in every direction - some to sneak into the show and others to get away from Quiet Riot. It was getting ugly. The air was starting to smell druggy and stabby.
I went along with a few other vendors that decided to drive the hour back to our safe little suburban Orange County homes, get some sleep, eat real food, make use of indoor plumbing, and come back the next morning.
It might have been cool to see Ozzy Osborne or Judas Priest but I didn't. I may have wanted to see Van Halen's last hurrah with David Lee Roth (I think) but I didn't.
Wimp? Guilty as charged.
What are my hard rock credentials you ask? My first concert ever was Led Zeppelin and I once saw Motorhead perform in a roller rink. Not enough? Still a wimp?
I'm okay with that.
Did I mention that Quiet Riot sucked?
DAY 3 - MONDAY, MAY 30TH - MAINSTREAM DAY (I think that's what it was called)
Little Steven and the Disciples of Soul - A bunch of guys from Bruce Springsteen's band that played the kind of stuff that Springsteen didn't play anymore. I liked it.
Berlin - It wasn't too long before this that they were the house band at Ichabods in Fullerton. They had a hit record at the time but they couldn't quite fill the big stage.
Quarterflash - I don't remember much. I thought they were Pat Benatar.
U2 - You who? They were one of the bands that I really wanted to see. I think this show was their big breakthrough - they started to get popular right after this. They were actually really good before they got all huge and ridiculous.
Missing Persons - No recall.
Pretenders - I liked them. No details available.
Joe Walsh - I have nothing against Joe Walsh, but he played too many Eagles songs.
Stevie Nicks - I'll be nice here. She probably either doesn't remember this show or would like to forget it.
David Bowie - This was his first US show in a long time, I think it was hyped as a big comeback. It was good but I was too burned out to really appreciate it. I saw him at Anaheim Stadium a few months later and it was much better.
Day 4 - ABOUT A WEEK LATER - COUNTRY DAY
Everybody seems to forget about this one.
Riders in the Sky - I got there late and didn't see them.
Thrasher Brothers - No recollection whatsoever.
Ricky Skaggs - I stopped and watched him up close for a while and he played some amazing bluegrass stuff. Why didn't he do more of this instead of his boring, mainstream country hits? I think he does now. Good for him.
Hank Williams Jr. - "I'm BO-O-O-O-CEPHUS! I LIKE TO GET DRU-U-U-NK!" got really old after an hour or so.
Emmylou Harris - Very nice. I think she took extra care not to wake up the passed-out Hank Jr. fans.
Waylon Jennings - The Man. The Legend. He was Waylon Jennings and you will never be.
Alabama - I don't think I stayed to see them. If I did, I don't remember. They should not have been billed over Waylon Jennings.
Willie Nelson - I left before he played.
Okay, it's time to take the program and put it away for another ten years. Who knows what historical revisions and lies I will come up with in 2023?
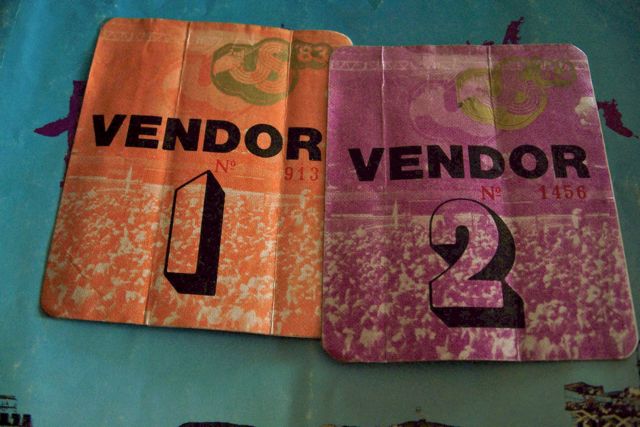
I wonder what these passes would go for on ebay.